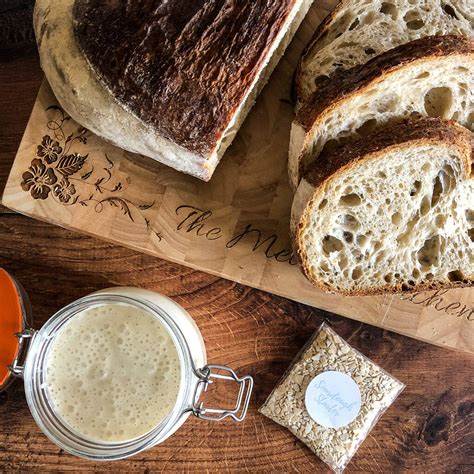
How to Raise Sourdough Starter: A Beginner’s Guide to Cultivating Wild Yeast

Raising a sourdough starter from scratch is a rewarding and enjoyable process, allowing you to bake naturally leavened bread without the need for commercial yeast. A sourdough starter is made by cultivating wild yeast and bacteria from the environment, and it takes a little patience to get it going. Here’s a step-by-step guide to help you raise your own sourdough starter at home.
What You’ll Need:
- Flour: Whole wheat or rye flour is ideal for starting a sourdough culture because it contains more nutrients and wild yeast. You can switch to all-purpose flour after the starter is established.
- Water: Preferably filtered or dechlorinated water at room temperature (chlorine can inhibit the growth of the yeast).
- A container: A glass jar or plastic container is ideal to mix and store the starter.
- A spoon or spatula: For stirring.
- A cloth or paper towel: To cover the jar and allow airflow while preventing debris from getting in.
Step-by-Step Guide to Raising Sourdough Starter
Day 1: Mix Flour and Water
- Combine flour and water: Start by mixing 100 grams (about 1/2 cup) of whole wheat or rye flour with 100 grams (about 1/2 cup) of lukewarm water in your container. Stir well to form a thick paste.
- Cover: Place a cloth or paper towel over the jar (or loosely seal with a lid) to allow air to flow in while keeping dust and debris out.
- Let it sit: Leave the mixture at room temperature (ideally around 70°F or 21°C) for 24 hours.
Day 2: Check for Bubbles
After 24 hours, check for signs of activity. You might notice some bubbles, a slight increase in volume, or a faint sour smell. This indicates that wild yeast and bacteria are starting to grow.
- Feed the starter: Discard about half of the mixture (roughly 100 grams) and then add 100 grams of fresh flour and 100 grams of water. Stir well to incorporate.
- Cover and wait: Cover the jar again and let it sit at room temperature for another 24 hours.
Day 3: Noticeable Activity
By now, you should start to see more bubbles and maybe even a stronger sour smell. Your starter may begin to rise and fall as the yeast activity increases.
- Discard and feed: Discard about half of the starter, and then feed it with another 100 grams of flour and 100 grams of water. Stir well.
- Cover and wait: Let it sit for 24 hours.
Day 4: Increased Activity
The starter should be showing clear signs of fermentation by Day 4. You should see consistent bubbles and hear a slight fizzing or cracking sound when stirring. The smell should be more sour, and the starter should be doubling in size after each feeding.
- Discard and feed: Continue the same process: discard half, then feed with 100 grams of flour and 100 grams of water.
- Cover and wait: Let it rest for another 24 hours.
Day 5: Ready for Baking?
By Day 5, your starter should be visibly bubbly, have risen significantly, and have a tangy, sour smell. It may be ready for baking if it’s doubling in size within 4 to 6 hours of feeding. You can test this with the “float test”:
- Float test: Take a small spoonful of your starter and place it in a glass of water. If it floats, your starter is ready to bake with! If it sinks, continue feeding for another day or two.
Ongoing Maintenance:
Once your starter is established, you can maintain it by continuing to feed it daily if you’re keeping it at room temperature, or you can store it in the refrigerator and feed it once a week.
- To store in the fridge: After it’s well-established, place the starter in the refrigerator, where it will slow down its fermentation process. Take it out, discard half, and feed it at least once a week.
- To use: If you’re planning to use your starter for baking, take it out of the fridge 24 hours before and feed it 2-3 times to reactivate the yeast.
Troubleshooting Tips:
- If your starter isn’t bubbling: It might be too cold or too warm. Yeast thrives in temperatures around 70°F (21°C), so try moving your starter to a warmer spot if necessary.
- If it’s too runny or watery: Add more flour to achieve a thick, pancake-batter-like consistency.
- If there’s no smell or it smells off: Ensure you’re discarding half the starter and feeding it with fresh ingredients. A sour, tangy smell is normal, but if there’s a rotten or foul odor, it might be a sign of contamination.
- Mold: If mold appears, discard the starter and start again, as mold can’t be safely removed.
Conclusion
Raising a sourdough starter from scratch requires patience, but the result is a thriving culture of wild yeast and bacteria that will give your bread that signature tangy flavor and chewy texture. By following this process, you’ll soon have a reliable sourdough starter ready for baking delicious, naturally leavened bread. Happy baking!
